When you're driving a car that's new to you, whether brand new or a used vehicle, it's important to know all the ins and outs of it. The best way to do this is to read the manual, however, sometimes you don't always get the chance or don't have one to go off of.
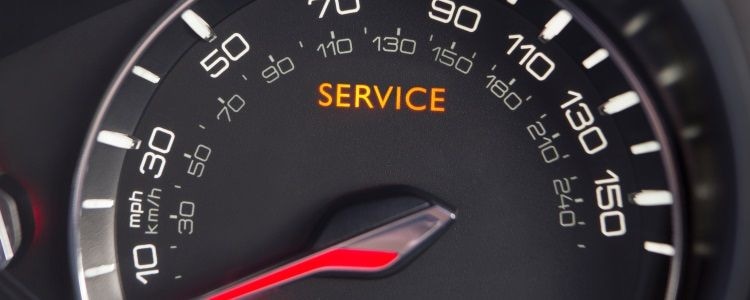
Some vehicles require service at certain intervals, and a convenient way to remind drivers is to have a maintenance required light in the car. You often see this on Japanese vehicle brands. If you have a maintenance-required light that comes on in your vehicle, you may need to turn it off. This can often happen if your maintenance light isn't reset after a service.
Here are the steps for resetting your maintenance-required light on Toyota, Lexus, and Honda vehicles.
What Does the Maintenance Required Light Mean?
The maintenance required light isn’t present in every vehicle on the market. Its sole purpose is to remind the driver that after so many miles the car needs to be taken in for regular maintenance. This can include oil or fluid changes, tire rotations, or changing the spark plugs. Typically, this light flashes for six seconds around the 4,500-mile mark interval when you start the vehicle and then disappear. Once your car reaches the 5,000-mile mark interval or more, the light stays on as long as the vehicle is running – this should be treated as a final warning.
While the maintenance required light doesn’t necessarily mean there’s something wrong with the car, you should still take it seriously if it pops up. It should signal you to call your mechanic or dealership and schedule a service appointment.

How to Reset Your Maintenance Required Light
When you take your vehicle to the dealer or shop, the mechanic is supposed to reset the light so the car can let you know when it needs regular maintenance again. But, because not every vehicle has this warning light, some mechanics forget to reset it. It can be concerning when the light comes on if you know you were recently at the shop and had regular maintenance done well before the 5,000-mile interval mark. The good news is that you can reset it yourself, and don’t have to waste time schlepping the car back to the shop.
The maintenance indicator light is set to different intervals depending on manufacturer recommendations. Be sure to check your manual for the service intervals on your vehicle. most Toyota, Lexus, and Handa vehicles have service intervals of 5,000.
If you have a Toyota…
- Put your key in the ignition and turn it to position one, the position just before starting the car.
- Push and hold the trip meter reset button on the dashboard, then turn your key to position two.
- Continue holding the odometer button for 10 seconds. The light should then flash, possibly beep, and then go out.
- Once off, release the odometer button and start the car. If you notice the light is still on, repeat this process only one or two more times to turn off the maintenance light on your Toyota model.
- If you continue to run into problems, it may indicate that you need additional services. Call your dealership or mechanic to schedule a service visit.
If you have a Toyota with a color display, you should be able to reset this using slightly different steps. These are:
- Turn the key to “on” but don’t start the engine. It may be marked as “II” on the ignition.
- If your Toyota has a push-button ignition, press the start button twice while keeping your foot off the brake.
- Select the cog icon on the multi-information display.
- Select “Scheduled Maintenance” on the display.
- The screen will ask you to confirm your selection. Select “OK.”
If you have a Lexus…
- Turn the ignition on.
- Flip the odometer/trip display to “ODO” mode or “TRIP A” mode.
- Switch the ignition off.
- Hold down the “Trip Meter Reset” button while turning the ignition switch back on.
- The maintenance light should blink, go solid, and then turn off.
- Release the “Trip Meter Reset” button.
- Turn the ignition off.
- Turn the ignition switch back on one last time to check your light.
If you have an older model Honda…
(Note that Honda calls their maintenance required lights “maintenance minder lights”)
- Turn the ignition to run (one click before starting the engine).
- Press the Select/Reset button located on either your steering wheel or as a knob on your dash. Depending on your model, either scroll through or press the knob repeatedly until “Engine Oil Life” or “Engine Oil Indicator %” is displayed.
- Press and hold the Select/Reset button for 10 seconds. The Engine Oil Indicator will begin to blink.
- If your display reads “Engine Oil Life”, select the Reset mode by pressing the Info button on the steering wheel. Then press the Select/Reset button to return your oil life to 100%.
If your display reads “Engine Oil Indicator %”, press and hold the Select/Reset knob for more than 5 seconds. The oil life indicator % will change to 100%

If you have a newer Honda...
Newer model Honda vehicles may have one of several options to reset the maintenance minder light on your vehicle. As technology changes, some of these processes become easier to do. Depending on your Honda model or trim, here is an additional option for resetting the maintenance required light on a Honda.
This method should work on any Honda trim model that has a touch screen with a home screen.
- Press home.
- Select settings.
- Press vehicle settings.
- Scroll down to maintenance info and press it to select it.
- Press reset.
- A screen will pop up asking if you really want to reset it or cancel. Press reset. Your maintenance minders should be gone and the oil life should read 100%.
If the light doesn’t go off when at step five (Toyota and Lexus) or step four (Honda), turn the vehicle off completely and start over. If after a few tries it still doesn’t turn off, consider taking it to your dealership or local mechanic.
Check Engine Light vs Maintenance Required: What’s the Difference?
Is the maintenance required light the same as the check engine light? Not at all. As we discussed earlier, the maintenance required light is triggered by mileage and is concerned with regular car maintenance schedules. The check engine light is triggered by something faulty in the OBD II system. The check engine light can go on for many reasons, including:

- Faulty or missing gas cap
- Overheated engine
- Low oil pressure
- Worn spark plugs or faulty wires
- Bad oxygen or mass airflow sensors
These are more serious repairs that need to be done, and if the check engine light comes on, you need to use a special code reader to find out what the problem is. Major auto parts stores have these you can use for free, or you can bring the vehicle to the dealer or shop and have them look at it.
FAQs
Why is my maintenance-required light still on after the oil change?
Sometimes a mechanic may not reset your maintenance required light after a service, typically, this happens if you're at an independent service shop. In this case, you need to know how to reset your maintenance light yourself. Additionally, if you have service early or late you need to reset your light manually so the computer in your car keeps accurate track of miles between services.
Can I still drive with the maintenance light on?
Yes, you can still drive with your maintenance-required light on, though it can probably be a minor annoyance. This isn't as dire a warning as your check engine light, which you should not drive around with on.
What happens if you don't reset the service light?
If you don't reset the maintenance light on your vehicle the car's computer won't keep accuate track of the number of miles between services, and this could cause you to inaccurately care for your car. Proper maintenance is required to keep vehicles running smoothly and minimize breakdown or repair needs.